
We will cover the needed steps to create a Springboot Rest API application, integrated with an OAuth2 service: Keycloak. This will allow us to authenticate with it and protect our application from unauthorised access. Also, we will be able to store all our users and roles in Keycloak and our application can access them.
Pretty much every web application I’ve made so far, required a login, and after years of doing it in several ways I’ve found this one very useful and simple to implement, if you know how. That’s why I made this series of post, and also a GitHub repository where you can find a fully functional example of this: GitHub Springboot Rest API Keycloak Integration Example
Requisites
To proceed with this post and its examples, you may have:
- Docker installed.
- GIT installed
- Java 17 or higher, I’ll use Java 21.
- Your favourite IDE, I’ll use IntelliJ.
All of the above items are a requirement, but I also recommend to check my post about Keycloak installation and configuration, to better understanding the next fiew steps: Keycloak Installation and Configuration with Docker
Configuring keycloak
First of all, we will need a Keycloak instance running and a few configurations on it:
- A Realm, in my case I’ll name it runesoft.
- A Client, in my case I’ll use login.
- A user. You can create your own.
So let’s begin.
Installing Keycloak
If you have checked my previous post abot Keycloak installation and configuration, you may have an instance running, if not, I’ll try to keep it simple. Let’s use Docker, and a docker-compose.yml file for easy use. Create it inside a folder in which we will create the Java + Spring project on. The file content should be:
version: '3'
volumes:
    postgres_data:
        driver: local
services:
    postgres:
        image: postgres:16.0
        volumes:
            - postgres_data:/var/lib/postgresql/data
        environment:
            POSTGRES_DB: keycloak
            POSTGRES_USER: keycloak
            POSTGRES_PASSWORD: keycloakdbpswrd
    keycloak:
        image: quay.io/keycloak/keycloak:22.0.3
        environment:
            DB_VENDOR: POSTGRES
            DB_ADDR: postgres
            DB_DATABASE: keycloak
            DB_USER: keycloak
            DB_SCHEMA: public
            DB_PASSWORD: keycloakdbpswrd
            KEYCLOAK_ADMIN: admin
            KEYCLOAK_ADMIN_PASSWORD: admin
        ports:
            - '9080:8080'
        command:
            - start-dev
        depends_on:
            - postgres
Once saved, we just have to open a terminal on that folder, and execute:
docker compose upIt will prompt how the images are being downloaded, and will deploy two containers:
- A PostgreSQL where Keycloak will insert the user data.
- Keycloak itself, with a WEB GUI on http://localhost:9080.
To check if Keycloak it’s up and runnig, we will wait untill the compose prompt us a message telling us not to use the develop configuration of Keycloak in production. Then, le’ts open a web browser and go to Keycloak’s landing page:
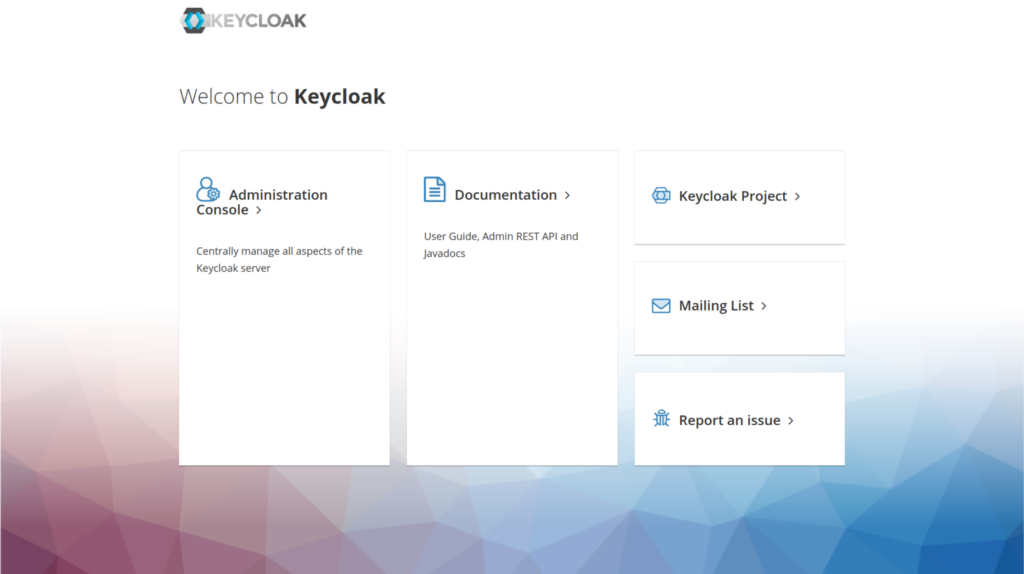
Now, lets login inside Keycloak’s administration console, by clicking on it, a login page should appear:
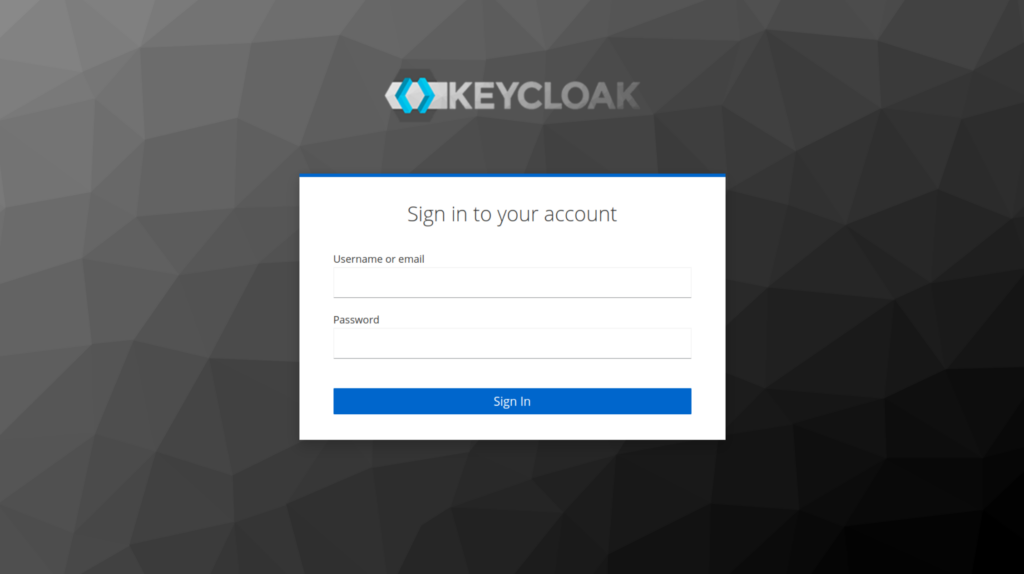
Once there, lets type the credentials we’ve used on that docker-compose.yml file before, the variables where KEYCLOAK_ADMIN and KEYCLOAK_ADMIN_PASSWORD, If you didn’t change it, use admin as user and password.
Creating a Realm in Keycloak
A Realm is like a store of clients, users and roles information, like a folder where you can administrate all about users, roles, connections and permissions to certain applications. Let’s create one by going to the top left corner, you should have a drop down with Master selected, click there and then on Create Realm:
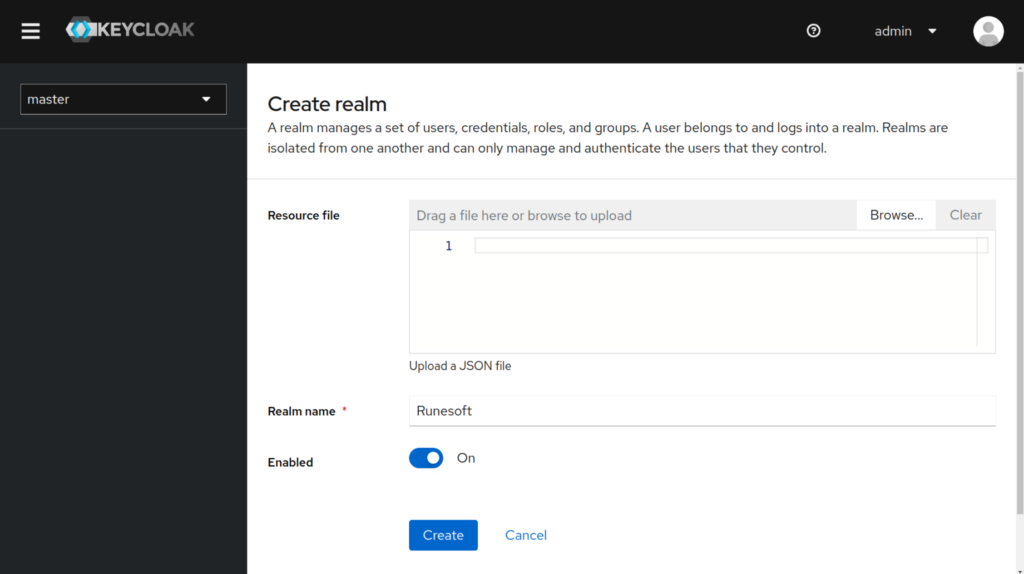
Here you just have to give the Realm a name, remember that realm names are case sensitive. I will name it Runesoft and click on create. You will see a success message if Keycloak successfully created the realm, and be moved to it.
Creating a Client in Keycloak
A Client will let us conenct from our Java application to retrieve data from Keycloak. Creating it will provide us a client-id and a client-secret, which we will be using to configure OAuth2 on Springboot configuration.
To create a client, check the Creating a Client section on my Keycloak Installation and Configuration with Docker post.
Creating a user in Keycloak
We will also need a user, to be able to test the login process and check if non authenticated cannot acces the endpoint, and, once autenticated, they can.
To create a user, check the Creating Users section on my Keycloak Installation and Configuration with Docker post.
Java Rest API with Spring
Let’s begin with the main part of this post: Integrate Java and Spring with an OAuth2 service: Keycloak. The goal of this is to be able to deploy a Java Rest API using springboot and secure it with OAuth2, so our endpoint is not accesible from unauthenticated users.
Pom.xml dependencies
First of all, we will need al the dependencies for our pom.xml, those being:
| DEPENDENCY | EXPLANATION |
| spring-boot-starter-web | For our Rest API (MVC). |
| spring-boot-starter-oauth2-client | To integrate with OAuth services such as Keycloak. |
| spring-boot-starter-security | To be able to secure our server. |
| spring-boot-starter-test | This one is optional for testing. |
Here’s how my my pom.xml file looks like:
<?xml version="1.0" encoding="UTF-8"?>
<project xmlns="http://maven.apache.org/POM/4.0.0"
         xmlns:xsi="http://www.w3.org/2001/XMLSchema-instance"
         xsi:schemaLocation="http://maven.apache.org/POM/4.0.0 http://maven.apache.org/xsd/maven-4.0.0.xsd">
<modelVersion>4.0.0</modelVersion>

<groupId>net.runesoft</groupId>
<artifactId>spring-keycloak-oauth2-example</artifactId>
<version>1.2.0</version>

<parent>
    <groupId>org.springframework.boot</groupId>
    <artifactId>spring-boot-starter-parent</artifactId>
    <version>3.1.5</version>
    <relativePath/>
</parent>

<properties>
    <project.build.sourceEncoding>UTF-8</project.build.sourceEncoding>
    <maven.compiler.source>21</maven.compiler.source>
    <maven.compiler.target>21</maven.compiler.target>
</properties>

<dependencies>
    <dependency>
        <groupId>org.springframework.boot</groupId>
        <artifactId>spring-boot-starter-web</artifactId>
    </dependency>
    <dependency>
        <groupId>org.springframework.boot</groupId>
        <artifactId>spring-boot-starter-oauth2-client</artifactId>
    </dependency>
    <dependency>
        <groupId>org.springframework.boot</groupId>
        <artifactId>spring-boot-starter-security</artifactId>
    </dependency>

    <dependency>
        <groupId>org.springframework.boot</groupId>
        <artifactId>spring-boot-starter-test</artifactId>
        <scope>test</scope>
    </dependency>
</dependencies>

<build>
    <plugins>
        <plugin>
            <groupId>org.springframework.boot</groupId>
            <artifactId>spring-boot-maven-plugin</artifactId>
        </plugin>
    </plugins>
</build>
</project>
With this, our pom file should be ready!
Properties.yml configuration
Now, let’s check our project configuration file. I’m using the .yml version instead of the .properties one, for me it’s easier to maintain. Before droping the file content, let’s check the configuration we need. The goal is to tell SpringBoot OAuth integrated client all the data it needs to properly connect to an external OAuth authentication service as Keycloak is. Those properties are:
| PROPERTY | VALUE |
| spring.security.oauth2.client.provider.external.issuer-uri | http://localhost:9080/realms/Runesoft |
| spring.security.oauth2.client.registration.external.provider | external |
| spring.security.oauth2.client.registration.external.client-id | login |
| spring.security.oauth2.client.registration.external.client-secret | <your-client-secret> |
| spring.security.oauth2.client.registration.external.scope | openid,offline_access,profile |
| spring.security.oauth2.client.registration.external.authorization-grant-type | authorization_code |
Now, the application.yml:
server:
  port: '8080'
  servlet:
    context-path: /runesoft
spring:
  application:
    name: Spring Keycloak Integration
  security:
    oauth2:
      client:
        provider:
          external:
            issuer-uri: 'http://localhost:9080/realms/runesoft'
        registration:
          external:
            provider: external
            client-id: login
            client-secret: <your-client-secret>
            scope: 'openid,offline_access,profile'
            authorization-grant-type: authorization_code
logging:
  level:
    org:
      springframework:
        security: INFO
  pattern:
    console: >-
      %d{dd-MM-yyyy HH:mm:ss} %magenta([%thread]) %highlight(%-5level)
      %logger.%M - %msg%n
Just remember to change the properties to your needs, like the client-secret, the path of the realm or the port.
Spring Security configuration
Now, let’ts create our WebSecurity configuration class, inside our src/main/java folder. There, we will enable web security and method security and also mark this class as a config one by using this three notations:
- @Configuration
- @EnableMethodSecurity
- @EnableWebSecurity
With this, Spring will recognice this class and use it to configure all the main web security filters as we define on it. To simplify, the flow is as follows:
- We start our application.
- It will load the oauth2Client and oauth2Login with de defaults defined in our application config before.
- The API gets an HTTP request from a client on an endpoint.
- That request goes through the filters defined in this class to check if the endpoint is covered with them.
- If that filter is just a permitAll() it will be granted with no user needed.
- If that filter is fullyAuthenticated():
- No user is provided, it will redirect to the Keycloak realm login.
- A cookie with a user is provided, it will be granted to access the endpoints covered by that filter.
import org.springframework.context.annotation.Bean;
import org.springframework.context.annotation.Configuration;
import org.springframework.security.config.Customizer;
import org.springframework.security.config.annotation.method.configuration.EnableMethodSecurity;
import org.springframework.security.config.annotation.web.builders.HttpSecurity;
import org.springframework.security.config.annotation.web.configuration.EnableWebSecurity;
import org.springframework.security.config.http.SessionCreationPolicy;
import org.springframework.security.web.SecurityFilterChain;

@Configuration
@EnableMethodSecurity
@EnableWebSecurity
public class SecurityConfiguration {

    @Bean
    public SecurityFilterChain securityFilterChain(HttpSecurity http) throws Exception {
        http.oauth2Client(Customizer.withDefaults());
        http.oauth2Login(Customizer.withDefaults());

        http.sessionManagement(session -> session.sessionCreationPolicy(SessionCreationPolicy.ALWAYS));

        http.authorizeHttpRequests((auth) ->
                auth.requestMatchers("/", "/login/**", "/oauth2/**").permitAll()
                .requestMatchers("/runesoft/*").permitAll()
                .anyRequest().fullyAuthenticated());

        http.logout(logout -> logout.logoutSuccessUrl("https://localhost:8080/realms/runesoft/protocol/openid-connect/logout?redirect_uri=http://localhost:8080/"));

        return http.build();
    }
}
With this file, only the base path /, the /login/** and /oauth/** paths well be allowed anonimously. Then, only the /runesoft/** paths will be allowed and only if authorised with Keycloak.
Rest API Example
Let’s create a Rest API example to prove this flow. I’ll make an endpoint to get the loged user data from the OAuth service. That endpoint is as easy as this code:
import org.springframework.http.HttpStatus;
import org.springframework.http.ResponseEntity;
import org.springframework.security.core.context.SecurityContextHolder;
import org.springframework.security.oauth2.core.user.OAuth2User;
import org.springframework.web.bind.annotation.GetMapping;
import org.springframework.web.bind.annotation.RequestMapping;
import org.springframework.web.bind.annotation.RestController;

import java.util.HashMap;

@RestController
@RequestMapping("/users")
public class UserController {

    @GetMapping("/me")
    public ResponseEntity<OAuth2User> me() {
        // Get user data from OAuth service (Keycloak).
        OAuth2User user = ((OAuth2User)SecurityContextHolder.getContext().getAuthentication().getPrincipal());
        return new ResponseEntity<>(user, HttpStatus.OK);
    }
}
With all this steps, we should have a fully functional Java Rest API integrated with Keycloak as an OAuth2 server.
Check the Keycloak and Spring integration
Time to check if all of this is working as expected. Just launch the application from your IDE, or running:
mvn clean installAnd when installed, launch the jar at target/*.jar with:
java -jar target/<jar-name>.jarOpen a web browser and type the URL defined for our app and our endpoint of user data: http://localhost:8080/runesoft/users/me. It should inmediatly redirect to our Keycloak realm login web page:
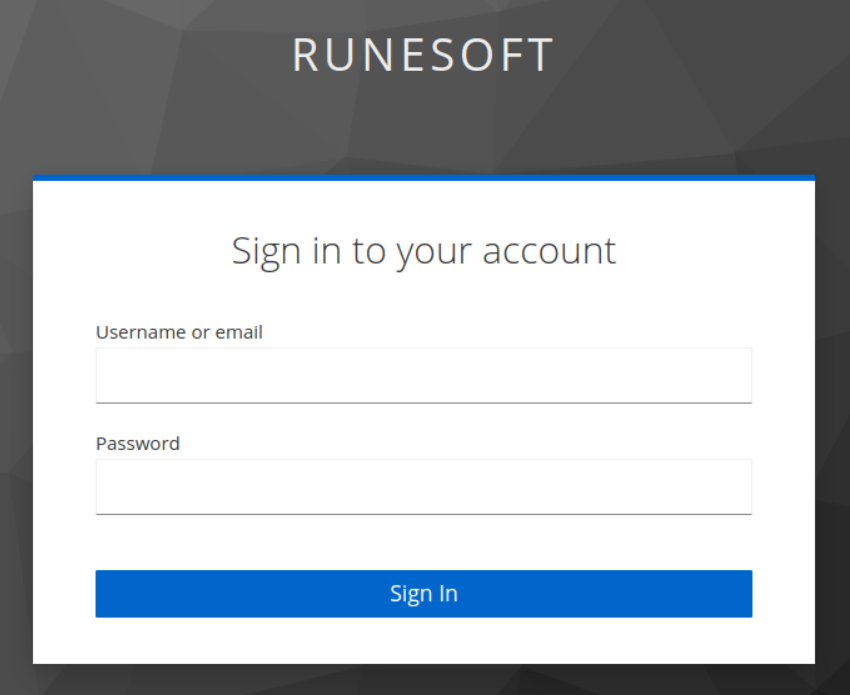
Introduce your user name and password and the endpoint should just prompt us the user data like so:
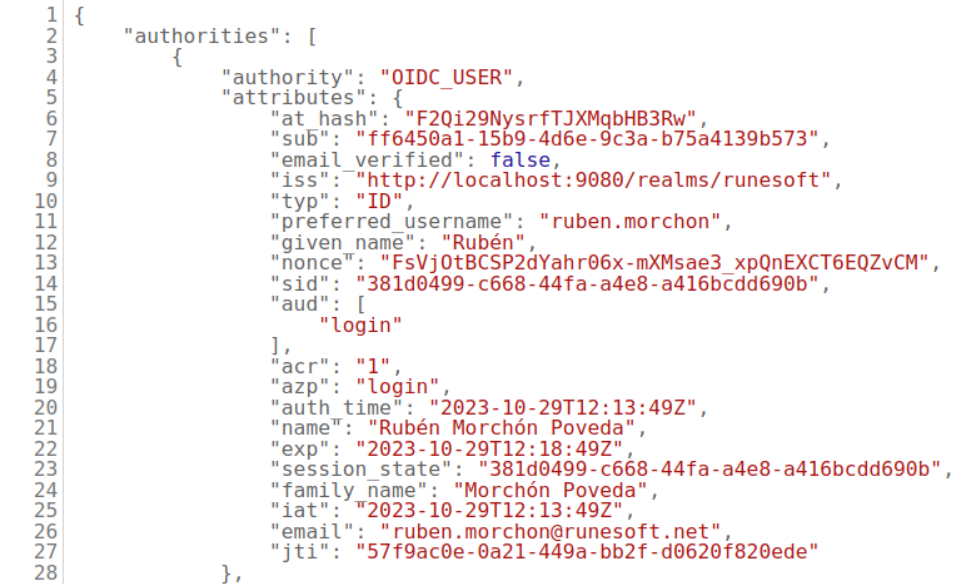
It works!
Conclusions
What we have learned so far with this post:
- How to install and create the needed objects on Keycloak’s server with it’s web GUI.
- The needed dependencies from Spring to work with an OAuth client.
- The WebSecurity configuration and properties.
- How to create and endpoint protected with Keycloak authorization.
Don’t forget to check a fully functional exaple on my github: GitHub Springboot Rest API Keycloak Integration Example
Hope you found this post interesting and useful, stay tunned for more!

