
Keycloak is an Open Source user management tool that has implemented several authentication methods such as OpenID and OAuth2. It acts as a user database/active directory. It’s pretty useful to build SSO (Single Sing-On) APIs. This is the first of a series of post about Keycloak, where I will explain how to build a Java API which verifies users on Keycloak, how to configure Keycloak’s login (and others) pages, and how to make and admin API to create new users and manage Keycloak through Java.
Requisites
To follow along with Keycloak installation, you may need:
- Docker installed, if you don’t have it, you can follow this post: How to install Docker.
- A web browser, which I suspect you already have!
Runing Keycloak on Docker
Keycloak have several ways to be installed: On linux, on Windows and on Docker. The last one is, at least for me, the easiest one to start with. To proceed, we just need to find the image and version we want to use. Keycloak have different sources, like Docker Hub or RedHat Quay.io, and different authors inside DockerHub, like JBoss, but the main one is from Keycloak itself on RedHat Quay.io. Also, the version I’ll be using is the 22.0.3, the latest one at the moment. If you want more information about the image, go to Keycloak’s Quay.io (or Keyloak’s Docker Hub).
To pull the image and un the container, I’ll show Docker CLI and Portainer GUI methods, with also a docker-compose file to easy use.
Using Docker CLI
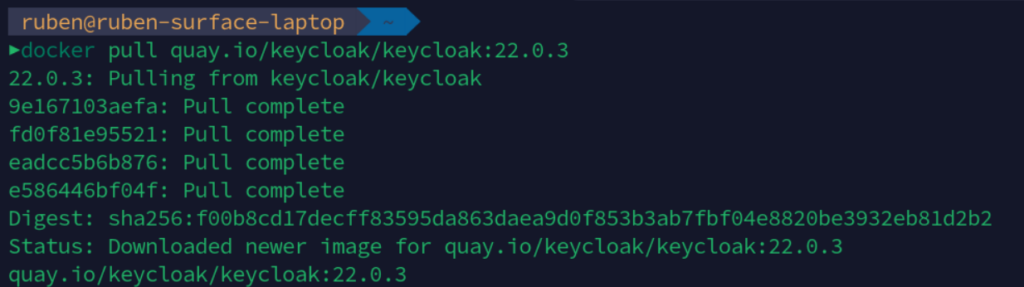
To download Keycloak image from Quay.io repository using Docker CLI, we should use docker pull command:
docker pull quay.io/keycloak/keycloak:22.0.3Once executed, Docker will start pulling the image and showing us the progress on each layer. The ending output should look like this:
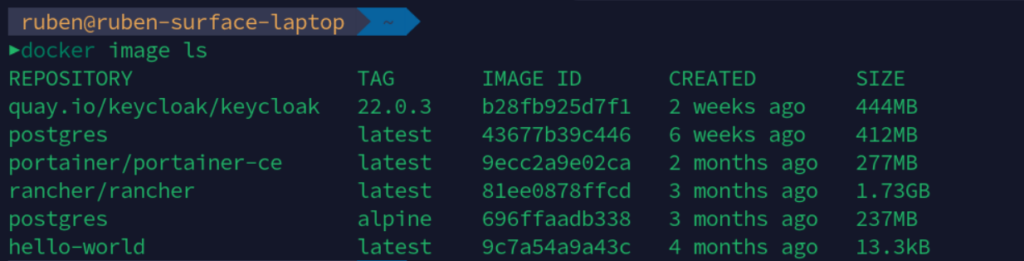
When it finishes, whe should be able to list our image using:
docker image lsThis will show up all the images we have pulled and are stored in our system:
Now, it is time to run Keycloak’s container over Docker, using the command below, which will use the downloaded image. If you didn’t pull it before, it will do it for you. Also, we wil lbe using two enviroment variables to launch it, named KEYCLOAK_ADMIN and KEYCLOAK_ADMIN_PASSWORD, in which you have to put the credentials you want to implement:
docker run -p 8080:8080 -e KEYCLOAK_ADMIN=admin -e KEYCLOAK_ADMIN_PASSWORD=admin quay.io/keycloak/keycloak:22.0.3 start-devOnce executed the comand, it will launch Keycloak’s image, and will prompt out the logs of Keycloak’s initialization:
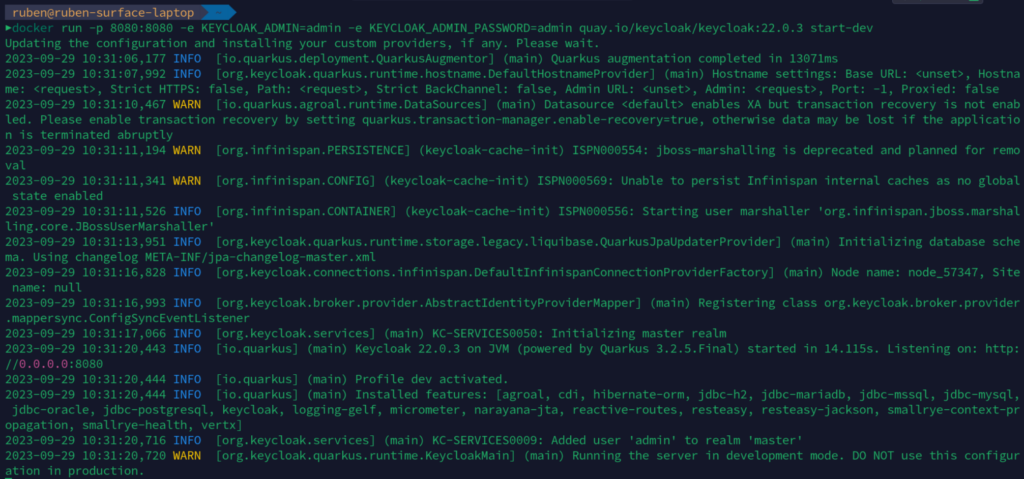
We are using the start-dev command, for developing purposes only. As it says at the end of the initialization, do not use it on production envoriment. I will cover more detailed installation method on Linux later on with other post on a more production ready way.
If you don’t want to keep the terminal opened, you can run the container in detached mode, by adding the -d flag on int. I will also give a propper name to the container, instead of letting Docker pick a random one, by using --name flag:
docker run -d --name keycloak -p 8080:8080 -e KEYCLOAK_ADMIN=admin -e KEYCLOAK_ADMIN_PASSWORD=admin quay.io/keycloak/keycloak:22.0.3 start-devIt will finish faster than the comand used before, givin us this output:

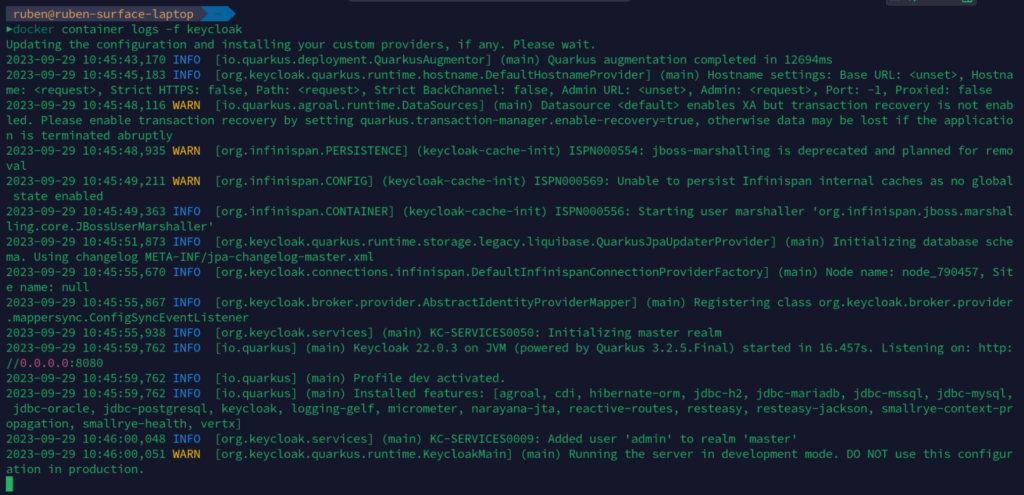
But it doesn’t mean that it finished the initialization at all, so, to be able to see it, we will fetch the logs from the container to wait until it says the same as the output from not detached mode from before, telling us not to use this configuraion in production. Execute:
docker container logs -f keycloakThat command will start fetching the logs from Keycloak’s Docker container, and update them to you on the terminal, so you can see the process in real time. It’s a pretty useful command. When Keycloak finishes its initialization, should look like this:
Now, Keycloak is up and running! Check it on its default page at http://localhost:8080!
Using Portainer GUI
Another way of running containers I’ve been using is Portainer. It is a pretty usefull web interface that allows to pull images, configure stacks and run containers. If you don’t have it installed, you can follow this guide: Install Docker and Portainer CE.
Log in into Portainer’s web interface by going to https://localhost:9443/, select your enviroment, and go to Images section on the left menu:
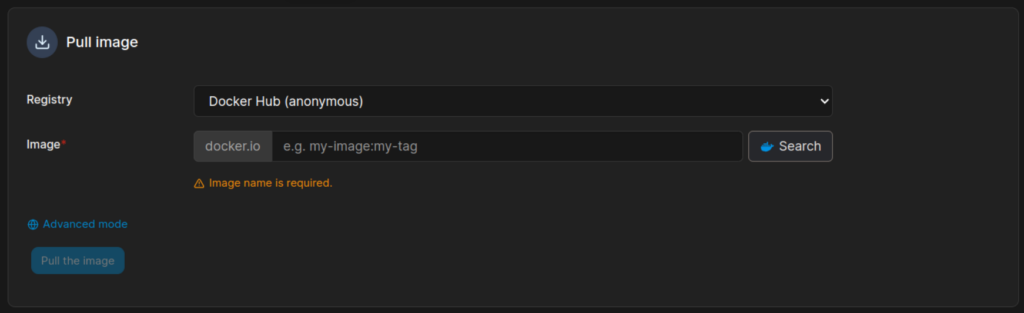
There you should use the advanced mode to be able to pick other repository, like Quay.io, by writting the full path of the image as follows:
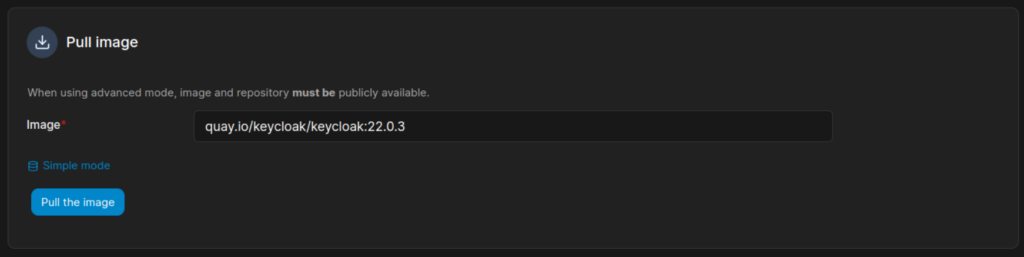
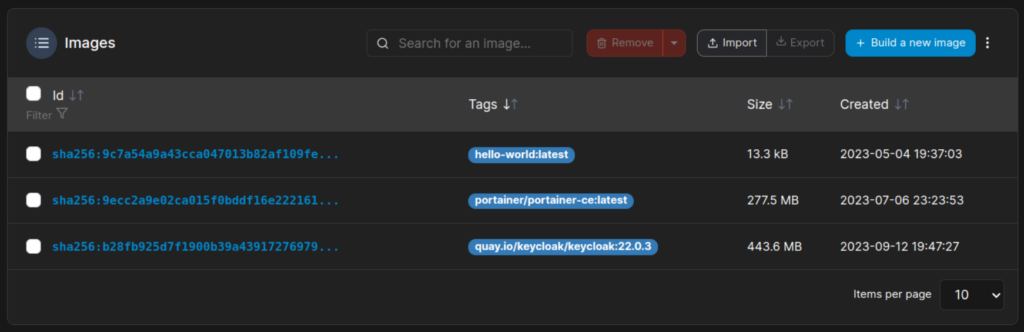
Clicking on Pull the image will start downloading it. If you followed the CLI section, the image should already appear on the list down below, if not, by doing the step above, will appear in a few seconds like so:
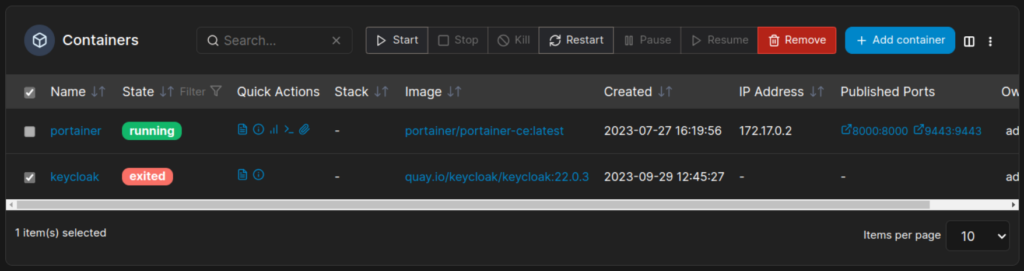
Now, time to run the container. Go to Containers section on the left menu, and the list of contaienrs you have will appear. As mentioned before, if you followed the steps with Docker CLI, you may have the Keycloak container already created, if you want to use Portainer GUI now, you can either delete the previous container to avoid name conflicts or use other name. To delete the container, select it an click Remove:
Now, we can safely create the container using Portainer. Click on Add container and a new screen will pop up, asking us all the configuration. As we did with the image pulling, select advanced mode and put the full path to the image quay.io/keycloak/keycloak:22.0.3:

Further down the configuration process, we have the ports we want to publish from the container, let’s add 8080:8080 here, by clicking on publish a new network port, should look as follows:

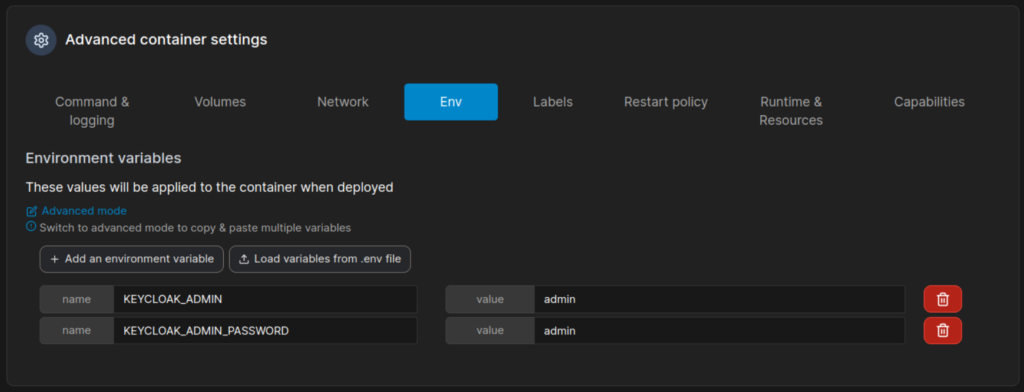
Now, on the Advanced container settings down below the page, we have several tabs, go to Env. This is where we will configure the enviroment variables, such as KEYCLOAK_ADMIN and KEYCLOAK_ADMIN_PASSWORD, with its values. To proceed, click on Add an enviroment variable for each variable you want to create, int his case, two times:
When finished creating the variables, it’s all ready to deploy the container: just above this adnvanced container settings section, there’s a button Deploy the container. Click it and its done, check it on http://localhost:8080
Docker compose
Keycloak does not need an external database to store users, but is recommended. Following this recommendation, I have created a docker-compose.yml file creating a PostgreSQL database where Keycloak will connect and store the needed data. Feel free to use this file and modify it for your needs. Remember to change the default passwords I have used.
version: '3'

volumes:
    postgres_data:
        driver: local

services:
    postgres:
        image: postgres:16.0
        volumes:
            - postgres_data:/var/lib/postgresql/data
        environment:
            POSTGRES_DB: keycloak
            POSTGRES_USER: keycloak
            POSTGRES_PASSWORD: keycloakdbpswrd
    keycloak:
        image: quay.io/keycloak/keycloak:22.0.3
        environment:
            DB_VENDOR: POSTGRES
            DB_ADDR: postgres
            DB_DATABASE: keycloak
            DB_USER: keycloak
            DB_SCHEMA: public
            DB_PASSWORD: keycloakdbpswrd
            KEYCLOAK_ADMIN: admin
            KEYCLOAK_ADMIN_PASSWORD: admin
        ports:
            - '8080:8080'
        command:
            - start-dev
        depends_on:
            - postgres
You can use this file by euther docker CLI using this command on the folder you store the docker-compose.yml file:
docker compose upOr using Portainer GUI, going to Stacks on the left side menú, clicking on Add stack, giving the stack a name, and pasting the file like so:
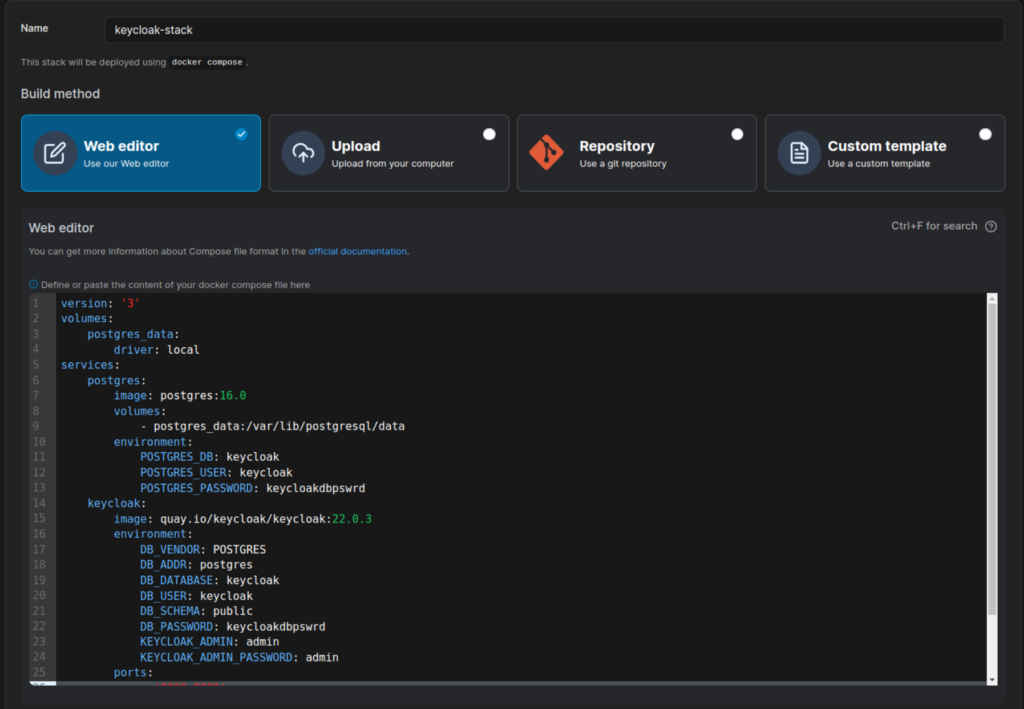
Now just clik on Deploy stack button down below.
With this last step, you have Keycloak installed and ready to use at http://localhost:8080!
Keycloak configuration
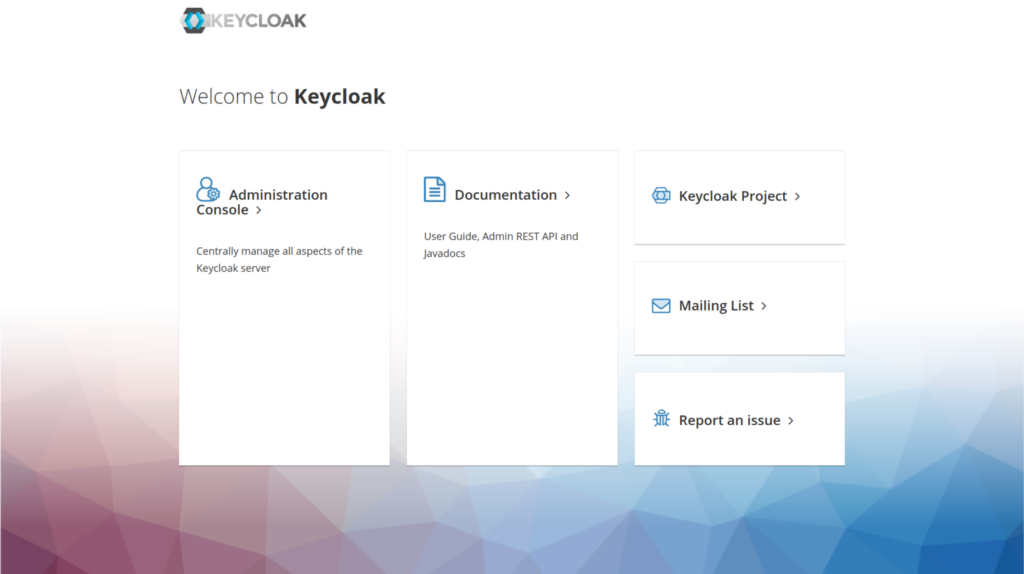
Keycloak has several configurations and objects to create, like Realms, Clients, Users… But first, we need to log in to its interface, using the username and password we put on the enviroment variables at the steps before when creating the container. Go to its default page at http://localhost:8080 and click on Administration console:
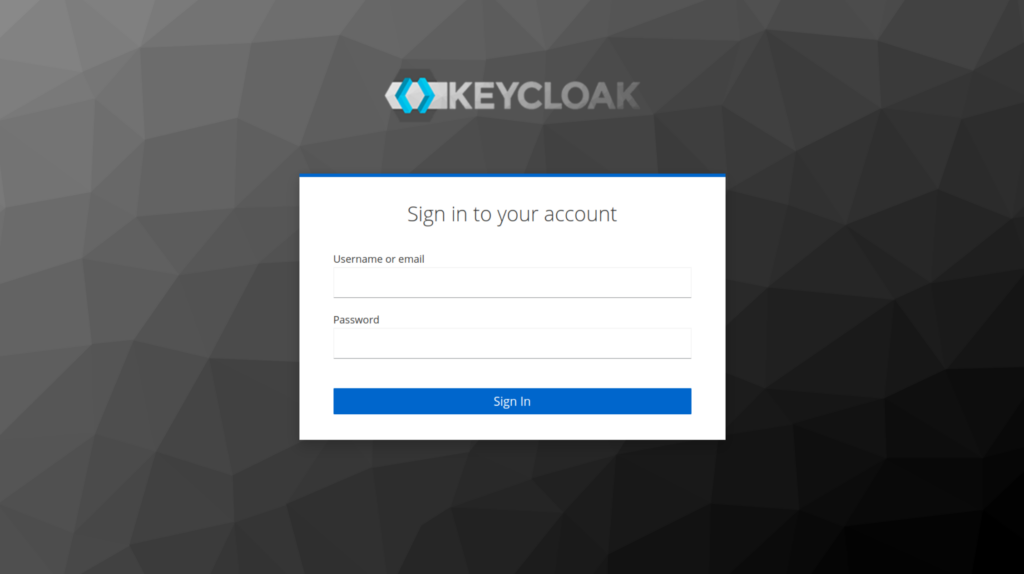
Then a login page should appear, like so:
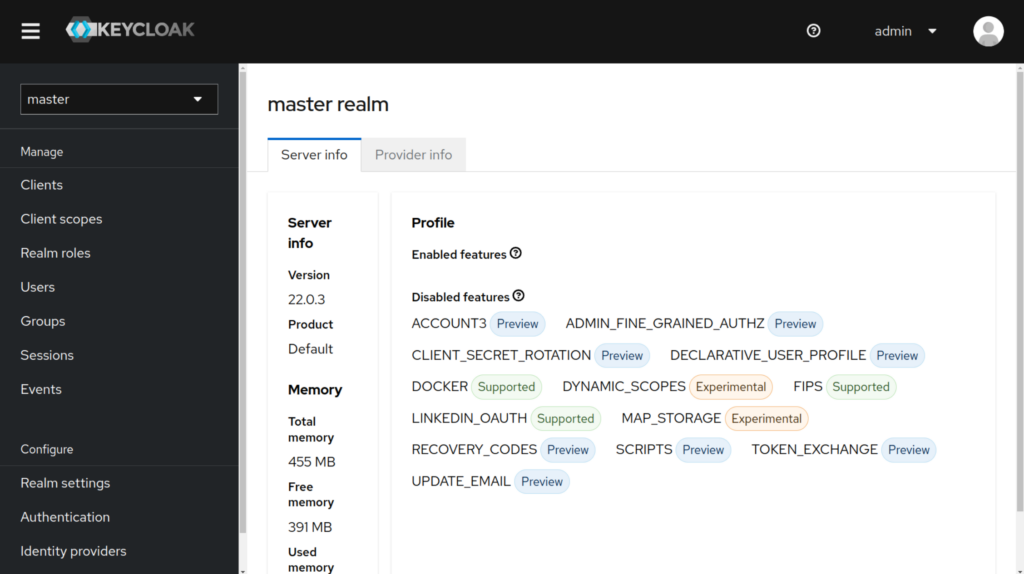
Once logged in, a main page will show, with some information about the Keycloak instance, and the realm we are in, by default, the Master realm.
Creating a Realm
To explain a little more, a Realm is like a store of clients, users and roles information, like a folder where you can administrate all about users, roles, connections and permissions to certain applications. Let’s create one for a future Java application I’ll be showing on a post later on this blog. On the top left corner, you should have a drop down with Master selected, click there and then on Create Realm:
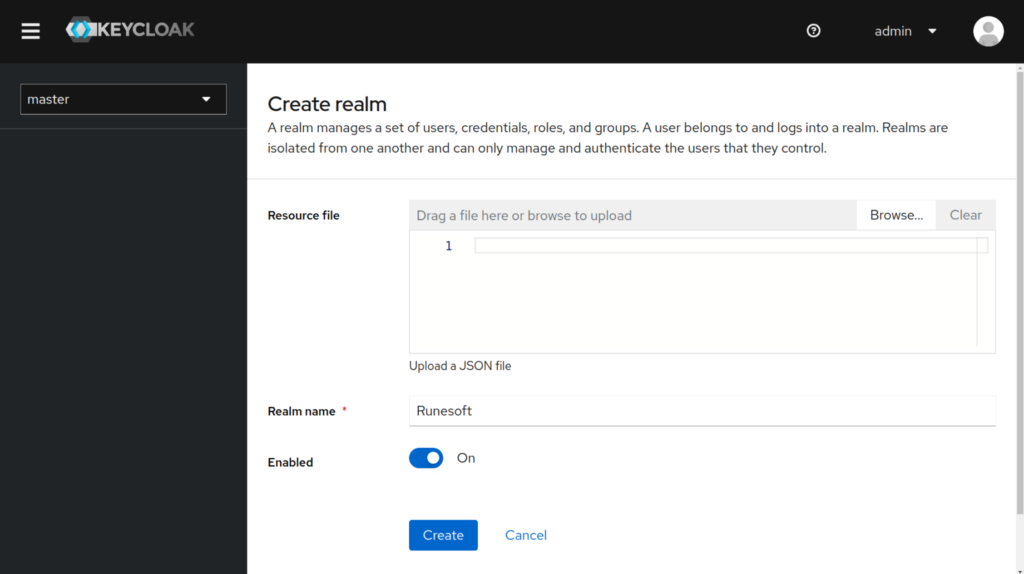
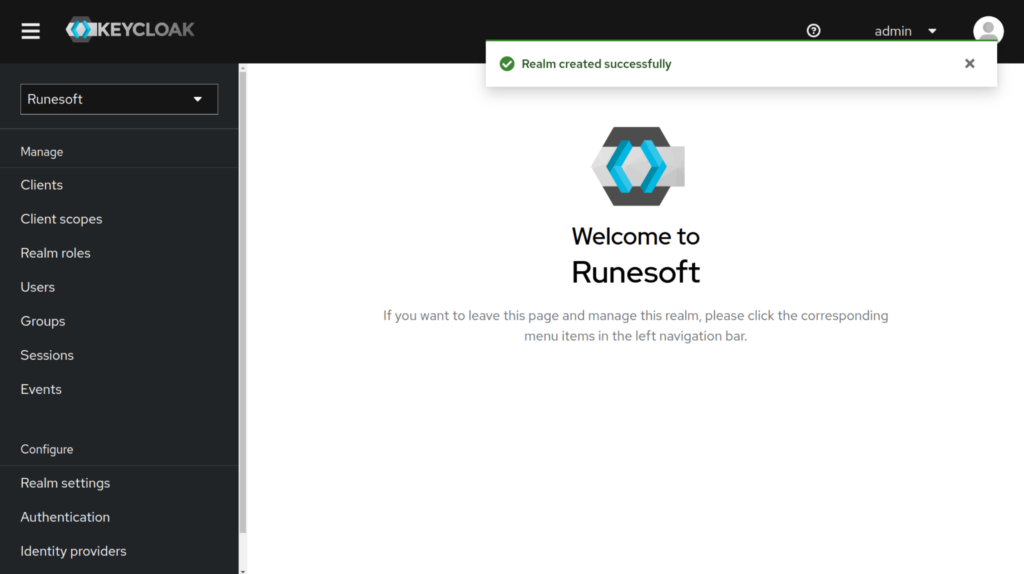
Here you just have to give the Realm a name, I will name it Runesoft, and click on create. You will see a success message if Keycloak successfully created the realm, and be moved to it:
With this few steps, we have created the realm. There is more deep configuration about it, like session tokens, login protocols and themes, etc. But that will be explained in other post, when we create a Java API which connects to Keycloak and requires a login in its frontend side.
Creating a Client
For Keycloak, a Client is an application that wants to connect to it. A client allows us to create connections using protocols like OpenID and OAuth2 to this realm, to verify users, obtain data, or manage the realm itself. To create one, remember to have your realm selected on the drop down, and click on Clients at the left side menu.
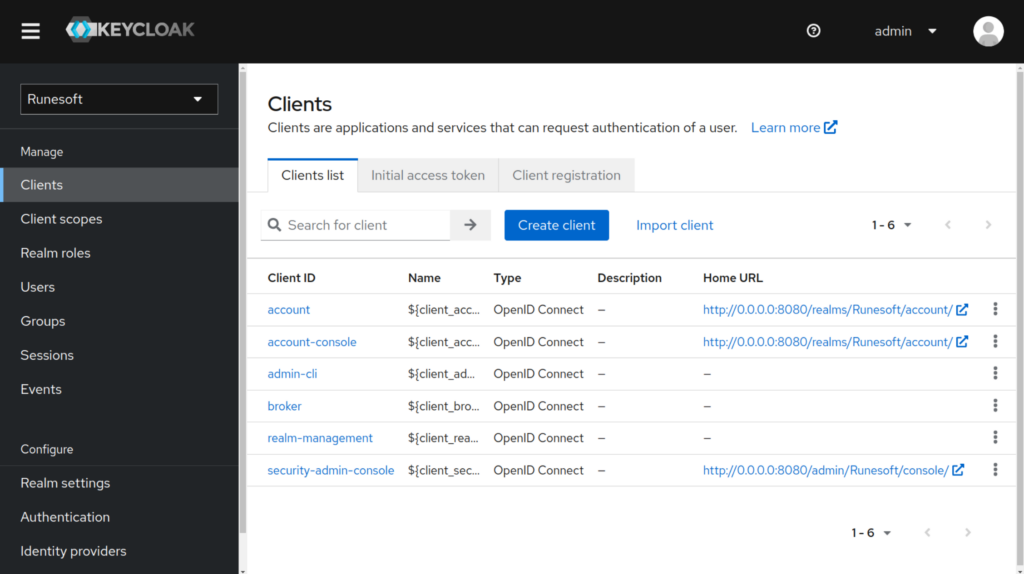
A list of the existing clients will appear. This clients are created by default by Keycloak. To add our own, click on Create client:
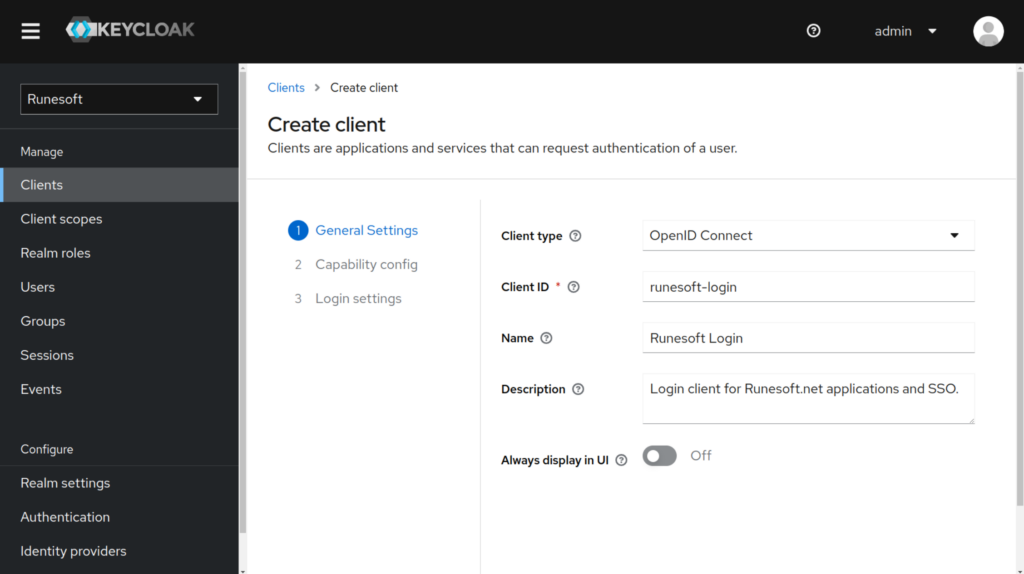
Here, we can just fill up the Client ID, but I will also give it a name and a description. This last two fields are the ones that will show up at the login interface when attempting to log in into this Realm using this client. Once you finished, click on Next.
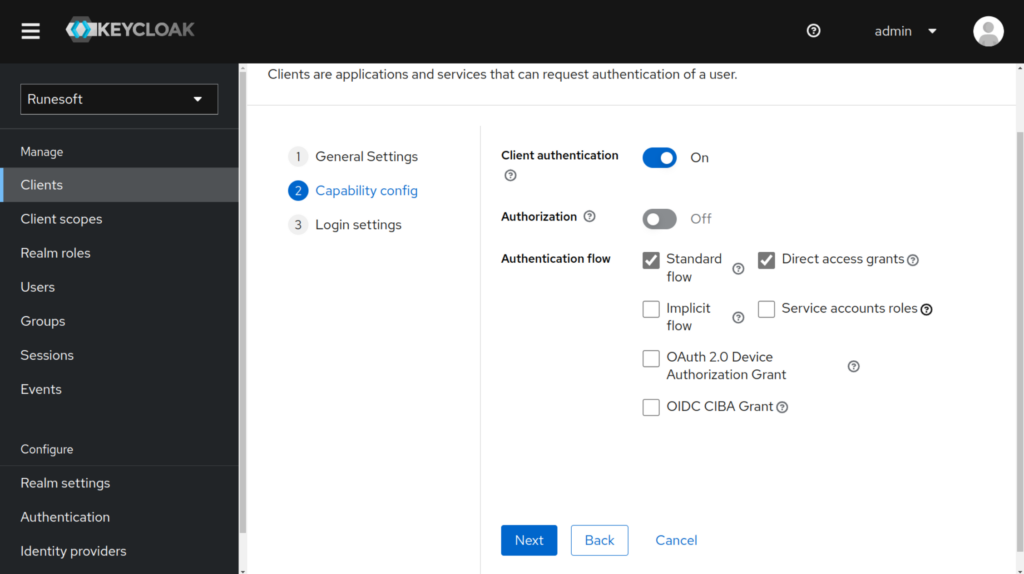
This step ask us about authentication methods and protocols that this client is going to use. By default, Client authentication is disabled, let’s enable it. The rest of them, you can get more information by hovering the interrogation mark, but for a loging client, we don’t need anything else, so click on Next again.
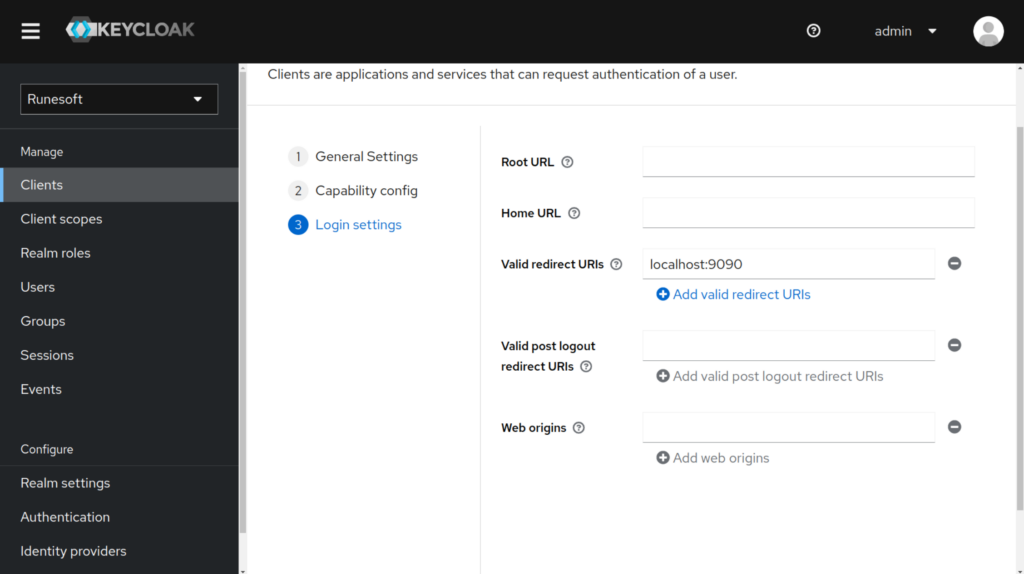
At the last configuration section, it ask us about some URLs/URIs, for us now, we can ignore and click Save, but as an example login application, we could fill the Valid redirect URIs field with the URLs we will let to be redirected after a successful login, like our Java application backend/frontend url.
Now, we have our client created, and it will be able to be configured on an application and log a user on our Keycloak Realm!
Creating Roles
On Keycloak, a Role allows us to conglomerate attributes and permissions or other roles, to conveniently assign them to users or clients, even other roles, allowing inheritance. But for us now, we will just create the role itself, by going to Realm roles section on the left menu.
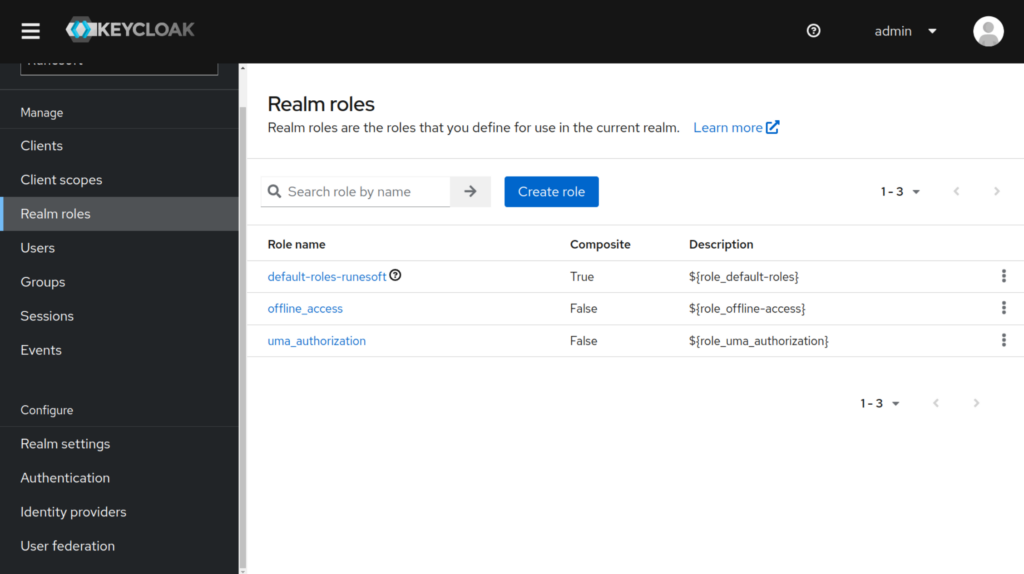
As with the clients, a list of the arleady available roles will show up. This roles are the Keycloak’s defaults. Let’s create a new one by clicking on Create role button right above the list.
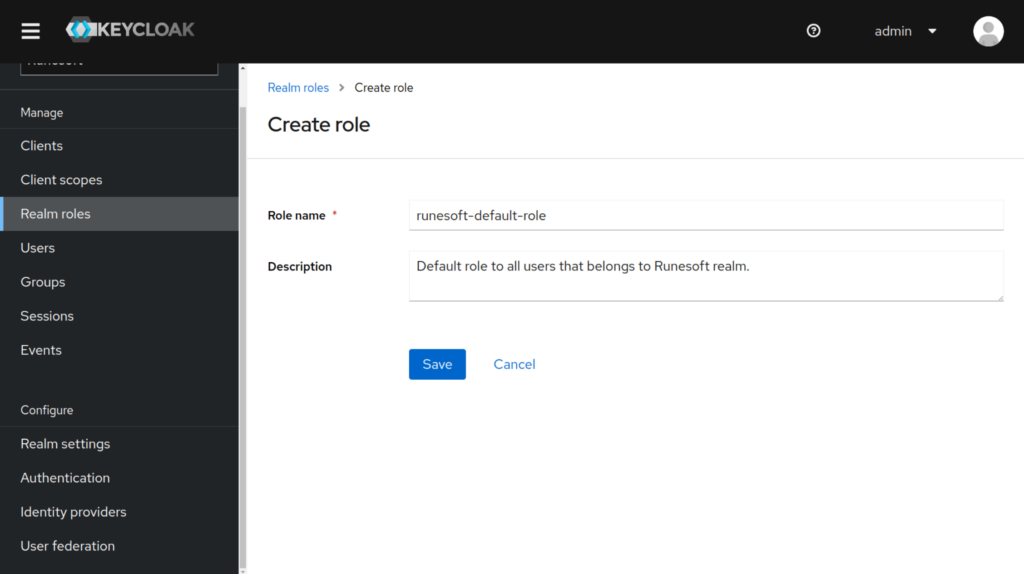
Give it at least a name, I’ll also fill up the description to better organization. Once finished, click on Save.
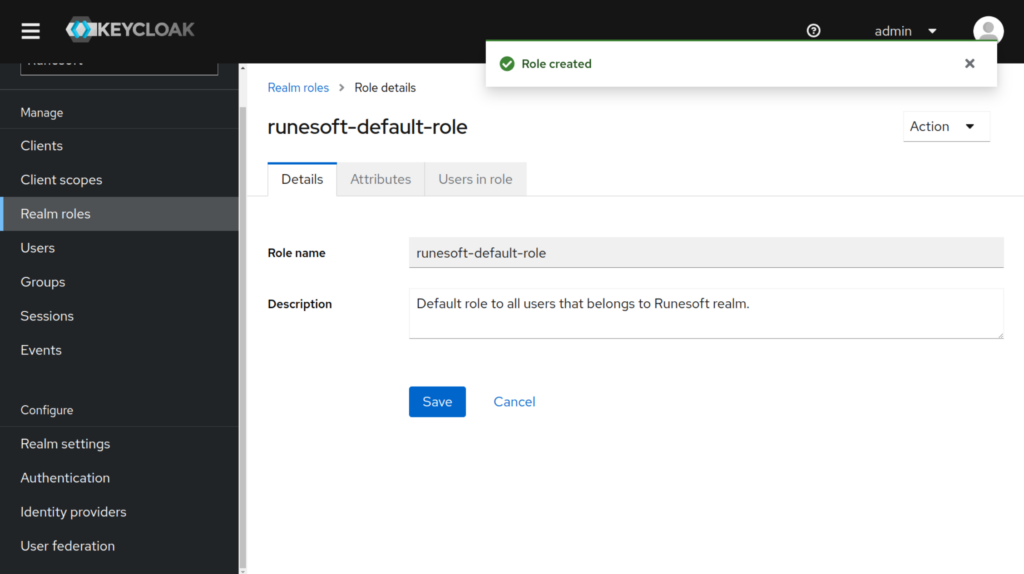
The role will be created, showing us a success message at the top right corner.
Creating Users
As the last step of this post section, we will create a user on our Realm. A user can have its attributes, credentials, description, name, mail… I’ll keep it simple this time, by creating a basic user and giving it a password.
Go to Users section at the left menu.
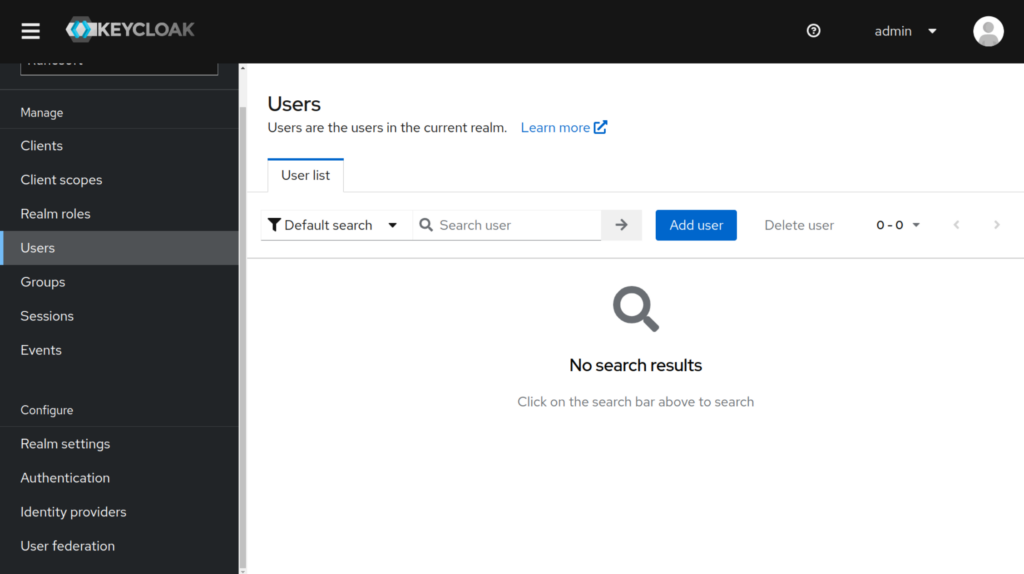
This time, Keycloak didn’t created any default users on this realm, being the list empty. Let’s click on Add user button above.
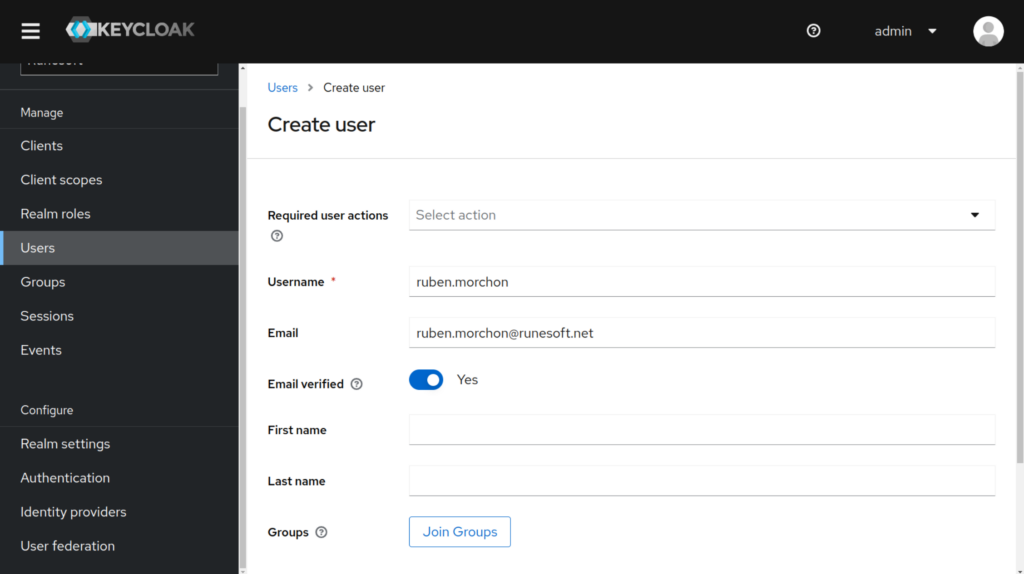
Fill up the form with at least the Username field. I will also check the Email verified to avoid verifying the mail account. When you are done, click on Create.
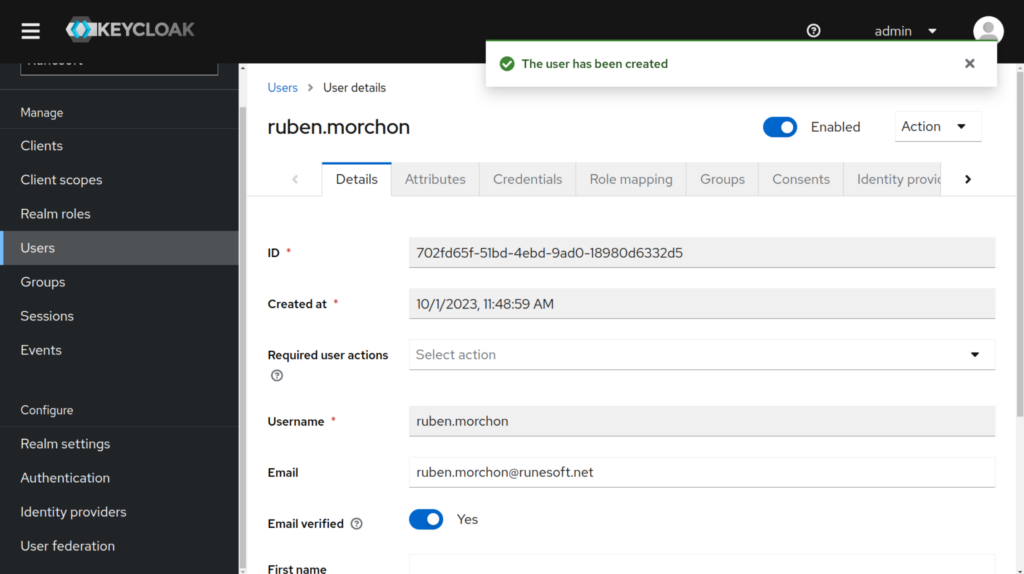
Now we almost finished with the user, the last thing we need is to give it a password. Go to the users’ Credential tab.
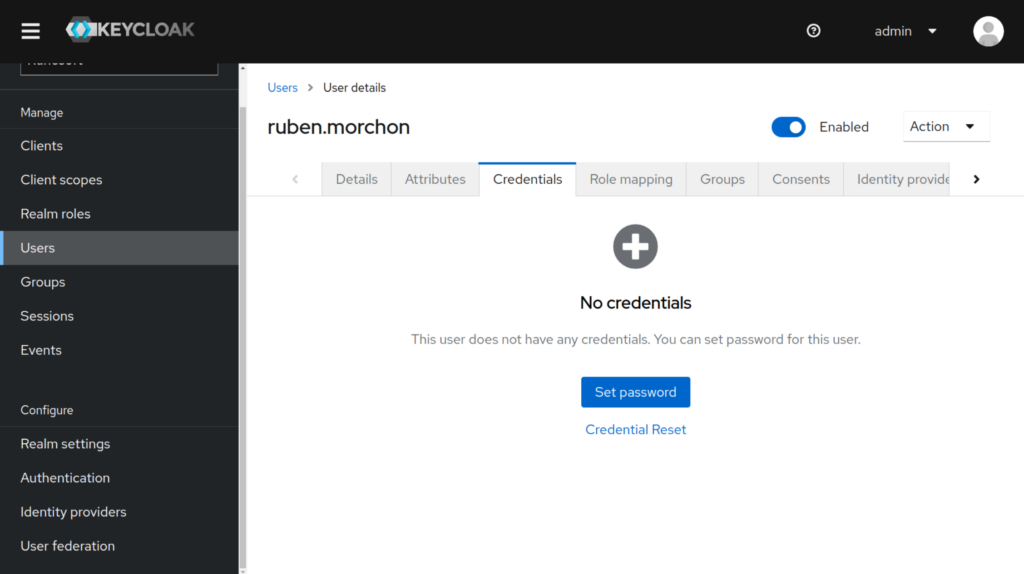
And click on Set password.
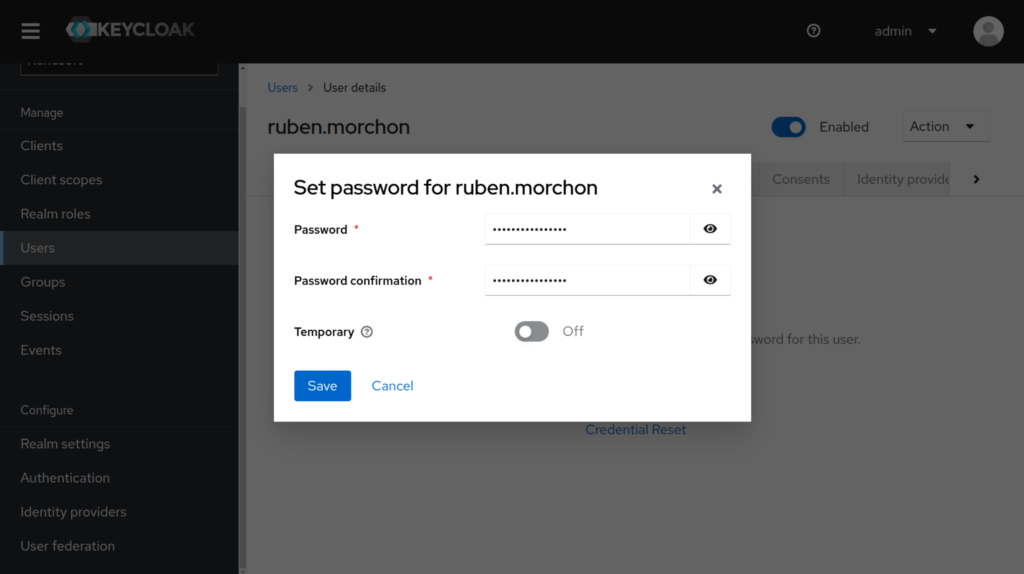
Fill up with your desired password, and uncheck Temporary toggle if you want to avoid the password to expire.
And its done! We have our user created inside our Realm. As a bonus, we can assign it the role we created before. Go to Role mapping tab inside the user details.
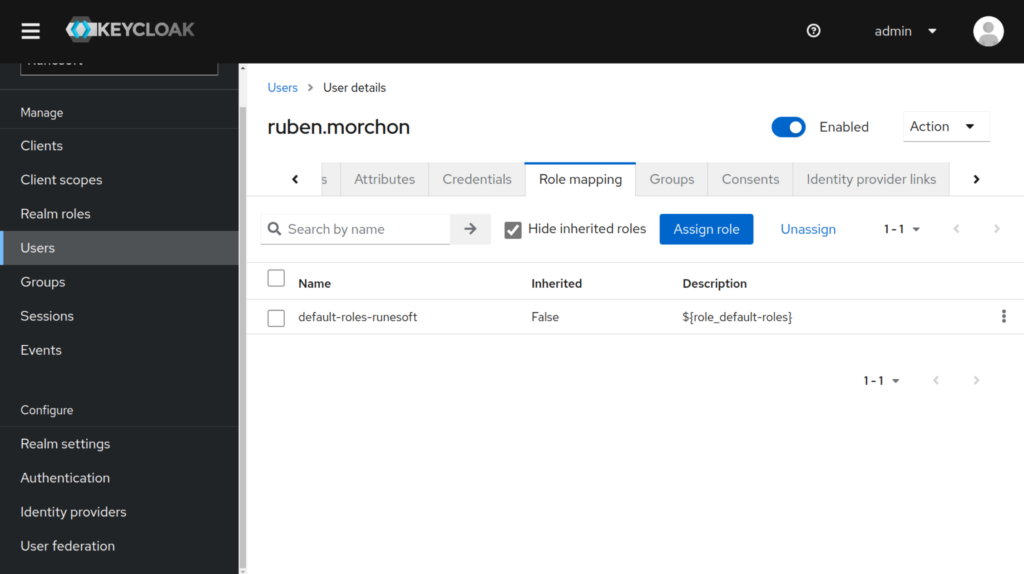
As we can see, there is already a default role assigned to our user. Keycloak made it for us, but let’s add our own. Click on Assign role button that is just above the list.
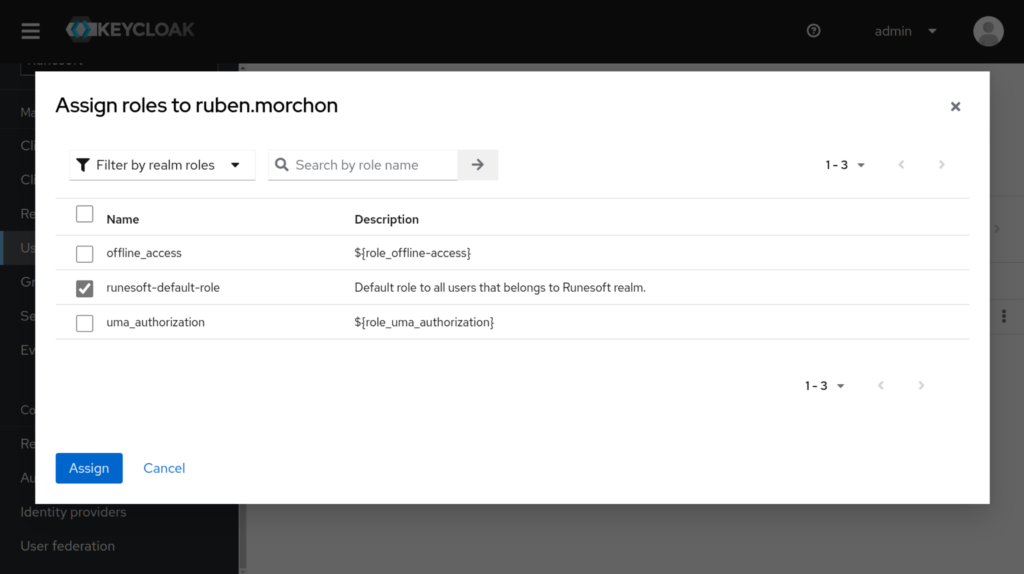
A list of the available roles from the realm will show up. Select the one we have created, and click on Assign to apply the changes.
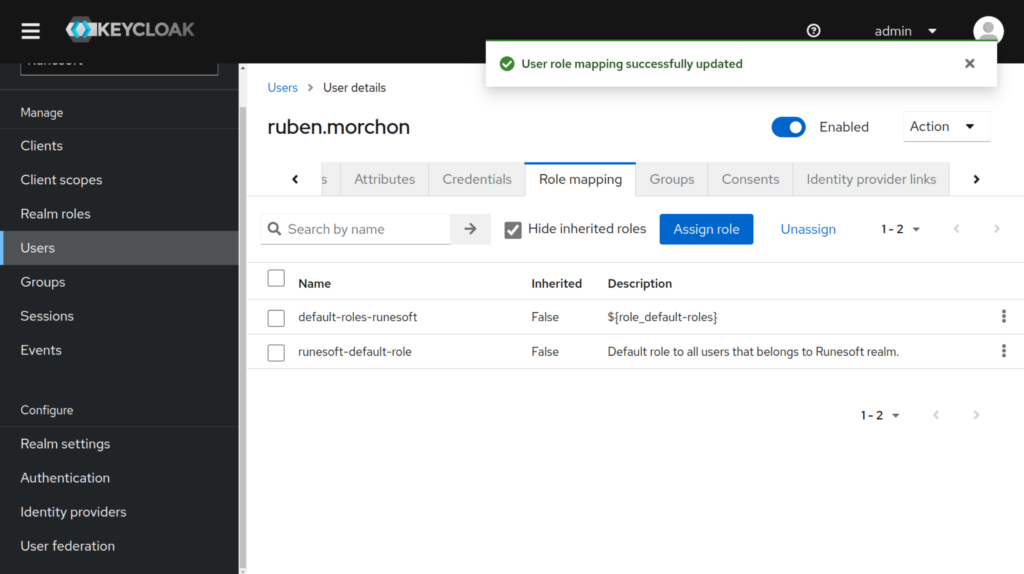
A success message will show up at the top right corner, and our role should appear on the roles list of the user. Now we have finished with the user creation, and also with the assignement of roles!
Summary
What we learned so far with this post:
- What is Keycloak.
- How to install it with Docker CLI.
- How to install it with Portainer GUI.
- Create a Keycloak Realm.
- Create a Keycloak Client inside our Realm.
- Create a Keycloak Role inside our Realm.
- Create a Keycloak User inside our Realm and assign it a Role.
Hope you found this post useful, and stay tunned for more of this Keycloak Series, like the Java API with Keycloak login!
